Disclaimer:
This is not a guide and don’t contain complete information. This document is like handwritten notebook, which will help you to start building LWC components from zero.
Introduction:
- Lightning web components are custom HTML elements built using HTML and modern JavaScript.
- Lightning Web Components is lightweight and delivers exceptional performance. Most of the code we write is standard JavaScript and HTML.
Pre-requisites:
- VS Code installed and 100% working with your Salesforce org (Retrieve / Deploy)
- Basic knowledge of JS and CSS
- Basic knowledge of LDS and Salesforce lightning library
- Interest to learn 😉
Basic Understanding:

Like demonstrated above, LWC bundle is consists of 3 major components and 2 optional components.
So, HTML is the front end then JS is the back like you know and CSS is for extra design. At the end meta (also called as configuration) file which holds the complete metadata values of the LWC folder.
You can use below command to create a new LWC.
- CTRL+Shift+P -> SFDX: Create Lightning Web Component

Whenever you create one LWC bundle, CSS file won’t be created by default. In case you need to add any extra CSS then you can right click on the bundle and click on ‘New File’ then give the exact name with extension ‘.css’.

Congratulation, you have created your 1st LWC bundle (obviously a blanked one :D)
The folder and its files must follow these naming rules.
- Must begin with a lowercase letter
- Must contain only alphanumeric or underscore characters
- Must be unique in the namespace
- Can’t include whitespace
- Can’t end with an underscore
- Can’t contain two consecutive underscores
- Can’t contain a hyphen (dash)
Note: always use camel casing naming convention (start with lowercase) and without any underscore (keep the naming short and less caps, else you will face problem while referring the component in another component)
How to include child component into parent component?
Suppose the child component name is ‘exampleChildComponent’. Then you can include the component like below:
<-- parent.html -->
    <template>
        <c-example-child-component></c- example-child-component>
    </template>
Structure:
HTML File:
HTML page is enclosed within <template>…. </template>
Rest is like normal Aura and here most of the library components are almost same with just a difference in how to write.
Like in Aura:
<lightning:input />
But in LWC:
<lightning-input />
So, : got replaced by –
And instead of many types of components, it has mainly one type i.e., Lightning.
Aura Library –
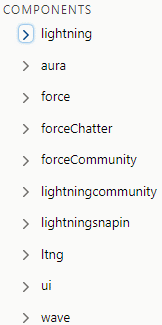
LWC Library –

Java Script File:
Once you start creating LWCs, you will realize how simple it’s in compare to Aura.
It follows few rules like normal JS,
1st import anything you want to use.
By default, a basic structure is created when you create the LWC Folder

Lightning Web Components uses modules to bundle core functionality and make it accessible to the JavaScript in your component file. The core module for Lightning web components is lwc.
The export statement defines a class that extends the LightningElement class. As a best practice, the name of the class usually matches the file name of the JavaScript class, but it’s not a requirement.
So, line 1 imports module elements and in line 3 we declare class to expose the component. And thus, we write all logics within that export statement.
2nd use Decorators to modify the behavior of a property or function
In simple word if you want to create JS Function or Call Apex Method or Use a variable then in that case you need to use Decorators.
There are 3 decorators:
- api
- track
- wire
@api: Marks a field as public.
@track: Tells the framework to observe changes to the properties of an object or to the elements of an array. Always holds latest value.
@wire: Gives you an easy way to get and bind data from a Salesforce org.
Note: To use these decorators, you need to 1st import from LWC like below:
import { LightningElement, api, wire } from 'lwc';
Meta File / Configuration File:
This is primary and most important file. For beginners it creates lots of trouble and waste valuable time if ignored.
Every component must have a configuration file. The configuration file defines the metadata values for the component, including supported targets and the design configuration for Lightning App Builder and Experience Builder.
There are many meta values but let’s discuss only those which are really required at very initial stages.
apiVersion: Salesforce API version 45.0 or higher. Regardless of apiVersion, the component always uses the latest version of Lightning Data Service and base Lightning components.
isExposed: If isExposed is false, the component isn’t exposed to Lightning App Builder or Experience Builder and should define at least one <target>, which is a type of Lightning page.
targets: Specifies where the component can be added, such as on a type of Lightning Page.
Few important targets:
| lightning__AppPage | Enables a component to be used on an App page in Lightning App Builder. |
| lightning__FlowScreen | Enables a component to be used on flow screens in Flow Builder. |
| lightning__HomePage | Enables a component to be used on a home page in Lightning App Builder. |
| lightning__Inbox | Enables a component to be used in Lightning App Builder to add to email application panes for the Outlook and Gmail integrations. |
| lightning__RecordAction | Enables a component to be used as a quick action on a record page. To specify the type of quick action, define a targetConfig with an actionType attribute. |
| lightning__RecordPage | Enables a component to be used on a record page in Lightning App Builder. |
| lightning__Tab | Enables a component to be used in a custom tab in Lightning Experience or the Salesforce mobile app. |
Retrieve Salesforce Data:
Using Salesforce Resource; like to get information about the current user, use the @salesforce/user scoped module.
Eg.: import Id from '@salesforce/user/Id';
Even you can check if current user has any userPermission or custoimPermission.
Eg.: import hasViewSetup from '@salesforce/userPermission/ViewSetup';
Use Lightning Data Service Wire Adapters and Function to retrieve data like using @wire to specify the getRecord Lightning Data Service wire adapter. To use getRecord, you need to import it first.
Like.: import { getRecord } from 'lightning/uiRecordApi';
Eg.:
import { LightningElement, api, wire } from 'lwc';
import { getRecord } from 'lightning/uiRecordApi';
import ACCOUNT_NAME_FIELD from '@salesforce/schema/Account.Name';

export default class Record extends LightningElement {
    @api recordId;

    @wire(getRecord, { recordId: '$recordId', fields: [ACCOUNT_NAME_FIELD] })
    record;
}
Call Apex Methods:
To call an Apex method, you need to 1st import it like below,
// Import methods
import getDetails from '@salesforce/apex/KT_Example_Class.getDetails';
// Call Apex Methods Imperatively
getDetails({param: this.variableValue.Id})
.then((result) => { ….})
.catch((error) => { … });
    // Wire Apex Methods to LWC
    @wire(getDetails, { param: this.variableValue.Id })
    		wiredMethod({ error, data }){
                		if(data){

                		}else if(error){… }
Reference:
Note: Ref# 1 is always a guide and Ref# 4 is must to do Trailmix to clear on basics
- https://developer.salesforce.com/docs/component-library/overview/components
- https://trailhead.salesforce.com/content/learn/projects/quick-start-lightning-web-components
- https://trailhead.salesforce.com/en/content/learn/modules/lightning-web-components-basics
- https://trailhead.salesforce.com/en/content/learn/trails/build-lightning-web-components
————————- Happy Learning 😊 ————————-
Thank you!
JP Mishra
