
When it come to setup VS Code, sometime its quite confusing. So I thought to make a step-by-step guide to make life easier while setting up VS Code for Salesforce for the first time.
So, let’s start.
Below are the steps you need to perform;
1. Install the Command Line Interface (CLI)
Through the CLI, you can easily create or connect to environments for development and testing, and synchronize metadata and code between your orgs and a version control system.
So, redirect to below URL and download the installer. And then follow simple next-next-finish step to install CLI.
macOS -> https://sfdc.co/sfdx_cli_osx
Windows 32-bit -> https://sfdc.co/sfdx_cli_win
Windows 64-bit -> https://sfdc.co/sfdx_cli_win64
At the end don’t forget to verify your installation by simply typing the command ‘sfdx’ in CMD (windows) or terminal (mac). You should see information related to CLI, if it’s not properly installed then it won’t find it.

2. Install Visual Studio Code
Redirect to URL (https://code.visualstudio.com/ ) and download latest version. And follow simple next-next-finish step to install.
3. Install Salesforce Extension Pack in VS Code
Open VS Code.
Click on Extension (or Ctrl+Shift+X)
Search Salesforce Extension Pack and Click on Install.

4. Install JDK 11 or 8
The Apex Language Server, shipped as part of the Salesforce Apex Extension for VS Code depends upon the Java Platform, Standard Edition Development Kit (JDK). It requires an installation of either JDK version 11 (Recommended) or JDK version 8.
- Redirect to URL (https://www.oracle.com/java/technologies/javase-jdk11-downloads.html) and install latest JDK 11.
- And follow simple next-next-finish step to install.
- Now configure/setup the path in VS Code
- Go to File -> Preferences -> Settings -> Search ‘Apex’
- Now copy the path from your C Drive (Program Files > Java > Open the JDK and copy the path) and paste in salesforcedx-vscode-apex.java.home

5. Create a new project with Manifest
Now close VS Code and reopen.
Open the command palette (press Ctrl+Shift+P on Windows or Linux, or Cmd+Shift+P on macOS) and enter the command ‘SFDX: Create Project with Manifest’

Select Standard Template and give a project name

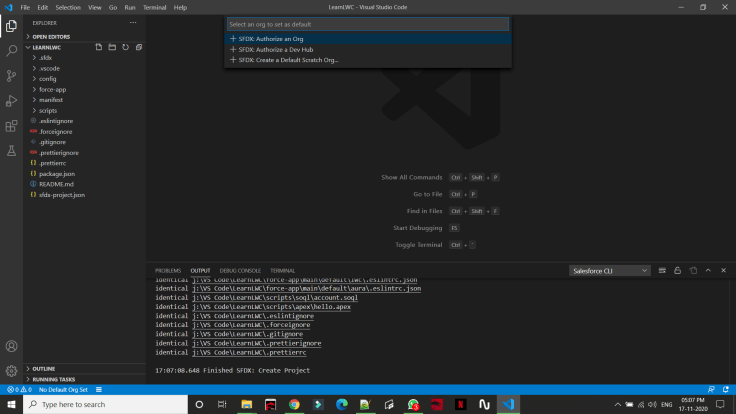
After this you will see the newly created project at left side explorer and left bottom a message ‘No Default Org Set’.
Click on ‘No Default Org Set’ and click on ‘SFDX: Authorize an Org’.
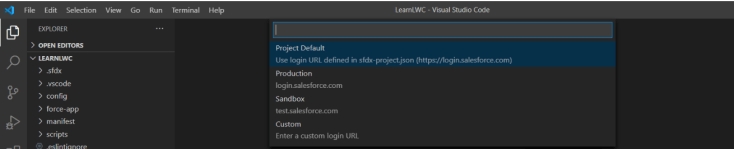
Now Select your salesforce org URL. If it’s free developer org then select Project default. Else Sandbox.
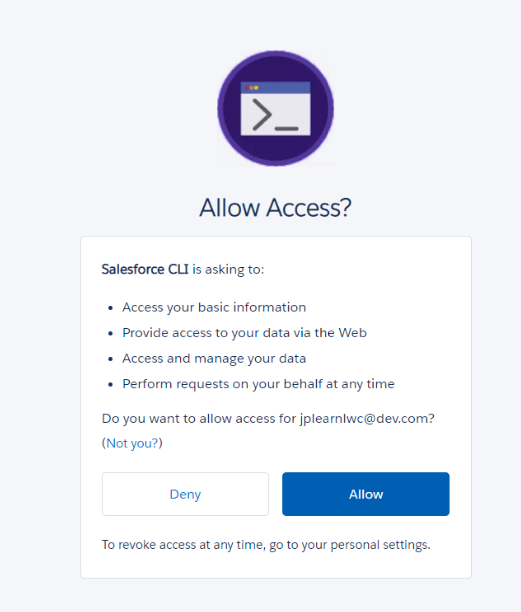
Now this will open your browser with Salesforce login page. Enter your credentials and click on allow.
6. Start working
Now you have completed the setup of VS Code and linked your sandbox/org to VS Code.
6.1 Fetch component from Salesforce org to VS Code workspace:
Now expand Manifest for explorer, click on package.xml.
Right click on package.xml and select ‘SFDX: Retrieve Source in Manifest from Org’. this will fetch the metadata from salesforce environment to your workspace and will be available under ‘force-app’


6.2 Create a new meta and deploy to salesforce:
Suppose you want to create a new Apex class, then right click on ‘Classes’ and select ‘SFDX: Create Apex Class’.
Now give a name and add your logic. Now right click on file and select ‘SFDX: Deploy This Source to Org’ to push the new file to Salesforce.


Here you go. I hope this blog post has helped you in setting up and started working using VS Code.
Happy Learning!!! 😊
