Hello Friends,
Welcome to Talk#7. In this talk, I will explain how to manage Organization Level Security.
This is set by maintaining a list of authorized users, setting password policies, and limiting login access to certain hours and certain locations.
So, the setups include:
- Create user
- Set Password Policies
- Set Network Access
1. Create User

User creation is the prime step in setting up the salesforce organization. Without a user, you won’t be able to login into the salesforce organization.
While creating a user you need to enter some mandatory information like
- Last Name
- Username
- Role (Even if you see the required mark, it’s optional)
- User License
- Profile
Note: There are other required fields that get auto-populated and you can update them if required (like Email Encoding, Time Zone, Locale, Language, Receive Approval Request Emails).
Follow the below step to create a User (some of the fields like Alias and Nickname get auto-populated).
- Go to Setup
- Search ‘Users’ in the Quick Find
- Click on ‘New User’
- Fill out all mandatory and relevant information
- Check the check box ‘Generate new password and notify the user immediately if you want to send the password reset email and welcome email immediately to the user.
- Click ‘Save’
2. Set Password Policies
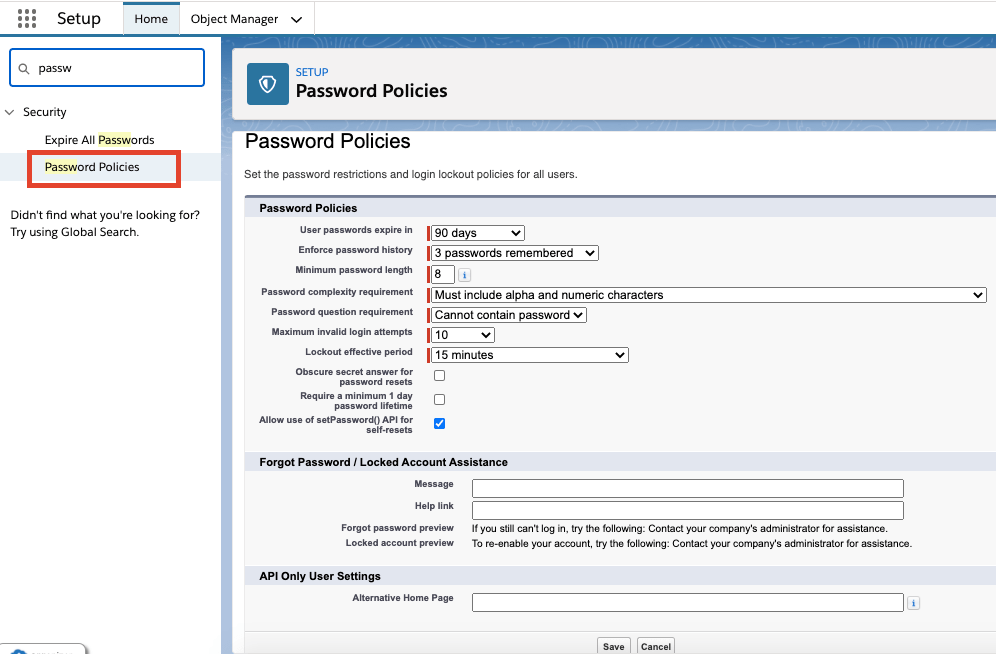
To improve the org security, you can define a set of rules for passwords. With this point and click setup, you can set password expiry date, length, and complexity requirements. You can also specify what to do when a user forgets the password. Password policies refer to the way the passwords are managed in your organization.
You can set up the below rules,
- Password expiry date
- Password history
- Minimum length of the password
- The types of characters that must be used in a user’s password.
- The restrictions to place on the password hint’s answer.
- The duration of the login lockout. The default is 15 minutes. This setting isn’t available for Self-Service portals.
- Hide answers to security questions as the user types. The default is to show the answer in plain text.
- A password can’t be changed more than once in a 24-hour period.
- Set a message to send users when they lock themselves out by trying to reset their password too many times.
- You can also set a help URL for the lockout case.
To set up password policies, follow the below steps
- Go to Setup
- Search ‘Password Policies’ in the Quick Find
- There will be predefined values in the policies. You can change them as per your business need. For any other help, you can always click on the ‘Help for this page’ link at the top right corner.
3. Set Network Access
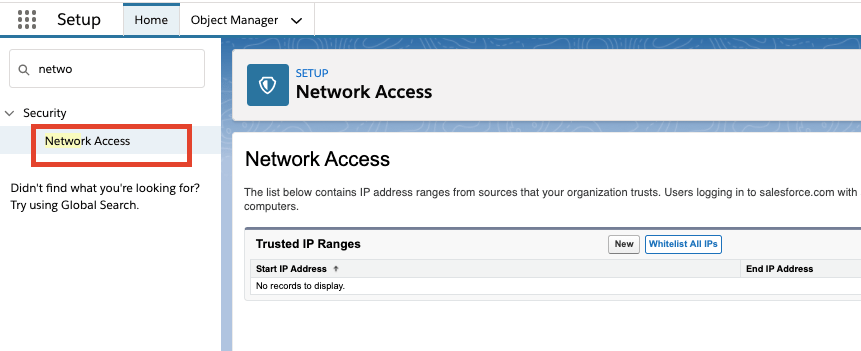
In this section, you can define all the trusted IP ranges. Users logging in to salesforce.com with a browser from trusted networks are allowed to access salesforce.com without having to activate their computers.
You can also Whitelist all IPs.
Please follow the below steps to add trusted IP ranges.
- Go to Setup
- Search ‘Network Access’ in the Quick Find and click on it.
- Click on New to add the IP ranges
- Or Click on Whitelist All IPs to Whitelist all the IPs.
Note: If you whitelist all IPs, this will allow users to connect from every computer without a verification code or security token. This might present a security threat.
